An Introduction to Visual Effects Compositing: Essential Tools and Techniques
So you want to learn the art of visual effects compositing, do you? Well, you’ve come to the right place. VFX compositing is how all the elements of a shot—live action footage, CGI, matte paintings, etc.—are seamlessly blended together to create a final composite that helps tell the visual story. It’s part technical skill, part creative eye. In this series, we’re going to walk you through the essential tools and techniques used by professional compositors every day.
We’ll start with the basics. What software do you need to get started? How do you work with layers and channels? Then we’ll move on to more advanced methods like rotoscoping, tracking, keying, color correction, and camera projections. You’ll learn the ‘why’ behind it all and pick up tips and tricks from industry veterans along the way. By the end, you’ll have a solid understanding of the compositing process and hopefully a few ideas for your own projects. So sit back, grab a drink, and enjoy the first steps on your journey to becoming a VFX compositing pro!
What Is VFX Compositing?
Compositing is the process of combining visual elements from separate sources into single images, often to create the illusion that all those elements are parts of the same scene. In visual effects, compositing is used to integrate computer-generated imagery (CGI) with live action footage, or to combine multiple CGI elements.
The Basic Process
The basic compositing process involves three main steps:
- Rotoscoping – The live action footage is rotoscoped to isolate elements that will be combined. This means animating digital masks to selectively extract subjects from the background.
- Matching – The CGI elements are matched to the live action footage. This includes matching lighting, color grading, and camera movement. The goal is to make the CGI look like a natural part of the scene.
- Seamlessly blending – The extracted live action elements are combined with the matched CGI in a way that hides the seams and makes them appear as if they were filmed together. This is done using tools like color correction, motion tracking, and mesh warping.
Compositing allows VFX artists to create visuals that would otherwise be impossible, dangerous, or too expensive to film live. When done well, the results can be seamless and transportive. The key is using the right tools and techniques to properly isolate, match, and blend all the elements together into a cohesive final image. With some practice, you’ll be crafting movie magic in no time!
Essential Compositing Tools: Layers, Color Correction, Roto/Paint
To start compositing, you’ll need the essential tools: layers, color correction, and rotoscoping/paint.
Layers are like transparent sheets stacked on top of each other. You can move them up and down, hide or show them, and control how they interact. Layers let you combine multiple visual elements into a single image.
Color correction lets you adjust brightness, contrast, hue, saturation, and more. You’ll use curves, levels, color balance, and lookup tables (LUTs) to match colors across layers and create different moods.
Rotoscoping and paint allow you to isolate elements by hand-drawing masks. Roto is frame-by-frame, while paint has tools like clone stamp, eraser, and stroke. These techniques take patience but give you ultimate control.
Essential Techniques
Compositing also relies on keying, tracking, and blending modes. Chroma keying removes a colored background. Motion tracking locks an element to a moving feature. Blend modes like ‘screen’ and ‘multiply’ mix layers in different ways.
Other useful tools include feathered masks, vector shapes, stylized text, color grading, grain/noise, lens flares, matte painting, and 3D models. With practice, you’ll be knocking out green screens, creating fantastical environments, and crafting visual effects in no time!
The key is not to get overwhelmed. Start with the fundamentals, learn by doing, and have fun with it! VFX compositing lets you create the impossible. Now get out there and make movie magic.
Keying and Green Screen Techniques
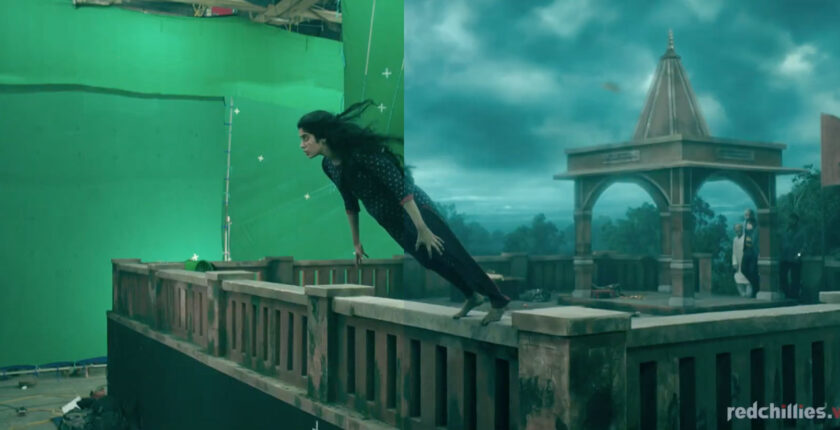
Keying and green screen techniques are essential skills in visual effects compositing. They allow you to seamlessly integrate live action footage with CG backgrounds or other visual elements. The basic steps involve filming your subject in front of a green screen, then removing or “keying out” the green screen in post-production and compositing in a new background.
Chroma keying
The most common keying technique is chroma keying, also known as green screening. This involves filming your subject in front of a brightly lit green screen. In your compositing software, you select the green color range to remove. The software will then make the green screen transparent, allowing you to see through to any background you add. For the best results, use a bright green screen and properly light your subject to avoid any green spill or reflection on them.
Luma keying
Instead of a specific color, luma keying uses the brightness values in the image. You select a brightness range to make transparent, allowing you to key out white or black backgrounds. Luma keying can be more difficult to work with, as it’s trickier to get an even, bright white background. It also risks making bright or dark areas of your subject transparent as well. However, it can be useful when green screens aren’t practical.
Rotoscoping
For more complex keys, you may need to rotoscope, hand-drawing mattes to isolate your subject frame by frame. This tedious technique is often needed for subjects with fine details like hair, or when there is motion blur. Rotoscoping provides the cleanest keys but can take a significant amount of time for high quality results.
With some practice, you’ll be seamlessly integrating your subjects into new virtual environments in no time. Keying is a foundational skill that unlocks so many possibilities for creative visual effects.
Motion Tracking for VFX
Motion tracking is an essential skill for any VFX compositor to master. It allows you to track the movement of an object in a shot so you can add computer-generated elements that follow the same movement. For example, you can track a sign or screen in a shot so you can replace it with a different message or image. Or you can track a moving object like a car so you can add computer-generated reflections or shadows that move realistically with it.
To start tracking an object, you need to select tracking points – small details and features on the object that you can follow from frame to frame. Things like the corners of an object, bolt holes, text or logos are all great tracking points. Select at least 4-6 points spread around your object for the best results.
Once you’ve selected your points, analyze the footage to detect the movement of those points through the sequence. Your tracking software will then generate tracking data – the information about how those specific points move and rotate over time.
With your tracking data, you can now add your CG elements like new text, images, shadows, etc. and have them move accurately with your footage. For screen replacements, you can use the tracking data to corner pin (distort) a new image to match the perspective and movement of the screen. For shadows and reflections, you use the data to animate CG cards or layers to follow the movement of your object.
Some other useful techniques for motion tracking include:
- Stabilization – Using tracking data to stabilize shaky footage by animating the footage to counteract the unwanted camera movement.
- Object removal – Tracking elements on either side of an object you want to remove so you can patch the background and reconstruct the area where the object was.
- Match moving – Tracking features in a live action plate so you can animate a 3D camera to match, allowing you to add CG elements that perfectly match the perspective and movement of the footage.
With practice, motion tracking will become second nature and open up many possibilities for enhancing your visual effects shots. Keep at it!
3D Integration in Compositing
To create realistic visual effects, 3D elements often need to be composited into live-action footage. This process, known as 3D integration, requires several key techniques to achieve a seamless result.
Camera Tracking
In order to place 3D objects into a scene, you first need to track the motion of the camera that filmed the footage. Camera tracking analyzes the footage to determine the camera’s position, orientation, and lens characteristics in each frame. The 3D software uses this information to render the 3D elements from the correct perspective so they appear properly integrated into the scene.
Color Correction
The lighting and color of the 3D elements must match the lighting and color of the live footage for the integration to look realistic. Color correcting the 3D render to match the plate photography helps the 3D elements blend in and appear as if they were part of the original scene. Consider things like the brightness, contrast, and color temperature of the light sources in the footage and match those qualities in your 3D lighting and materials.
Interactive Lighting
For the best results, the 3D objects should influence and be influenced by the lighting in the live footage. Interactive lighting means the 3D objects realistically cast shadows, reflect, and are illuminated by the lighting visible in the plate photography. To achieve this, you need to recreate the lighting conditions from the footage in your 3D software using image-based lighting techniques like high dynamic range image probes.
Depth of Field
If the footage has a shallow depth of field, you’ll need to match that depth of field in your 3D render to achieve a realistic composite. Adjust the camera settings in your 3D software like focal length, f-stop, and focus distance to achieve a similar depth of field to the plate photography. Elements outside the focal range will appear soft and out of focus, helping the 3D objects blend seamlessly into the scene.
By applying these key techniques, you can create 3D composites that look as if the elements were part of the original footage. With practice, you’ll be creating Hollywood-level VFX in no time!
Conclusion
That covers the basics of visual effects compositing and some essential tools and techniques to get you started. Now it’s time for you to dive in and start experimenting. Fire up your compositing software of choice and play around with layers, color correction, rotoscoping, and all the other techniques we discussed. Start with some simple shots to get a feel for it, then move on to more complex comps as your skills improve. The key is practicing consistently. Even working on small test shots for just 30 minutes a day can make a huge difference in a short amount of time. Before you know it, you’ll be cranking out professional-level visual effects and wondering how you ever lived without these skills. The world of film and video is your oyster—now go out there and make some movie magic!